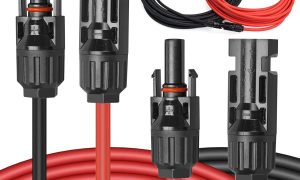




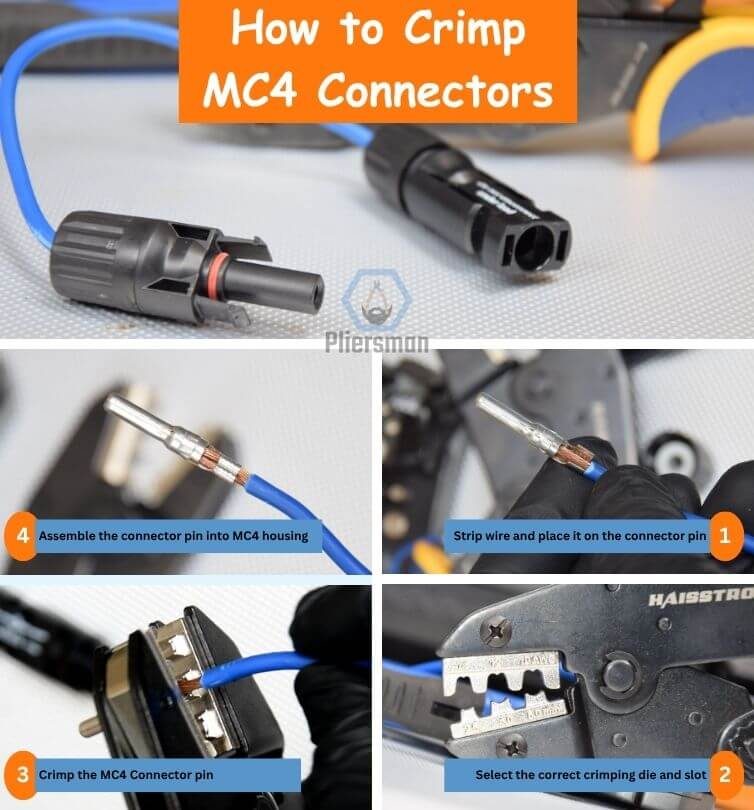
Vanonpower.com – Wiring MC4 connectors requires a precise crimping process to ensure a gas-tight electrical connection and a robust, weather-resistant seal that prevents moisture ingress in solar PV systems.
The MC4 connector is the industry standard for photovoltaic installations, designed to handle high-voltage DC current while remaining exposed to harsh environmental conditions. Improper assembly is the leading cause of solar array failures, often resulting in high-resistance connections, arcing, and catastrophic fires. Achieving a reliable connection is not just about aesthetics; it is a critical safety requirement for any solar power system.
📷 Photo by pliersman.com
Essential Tools for Professional Assembly
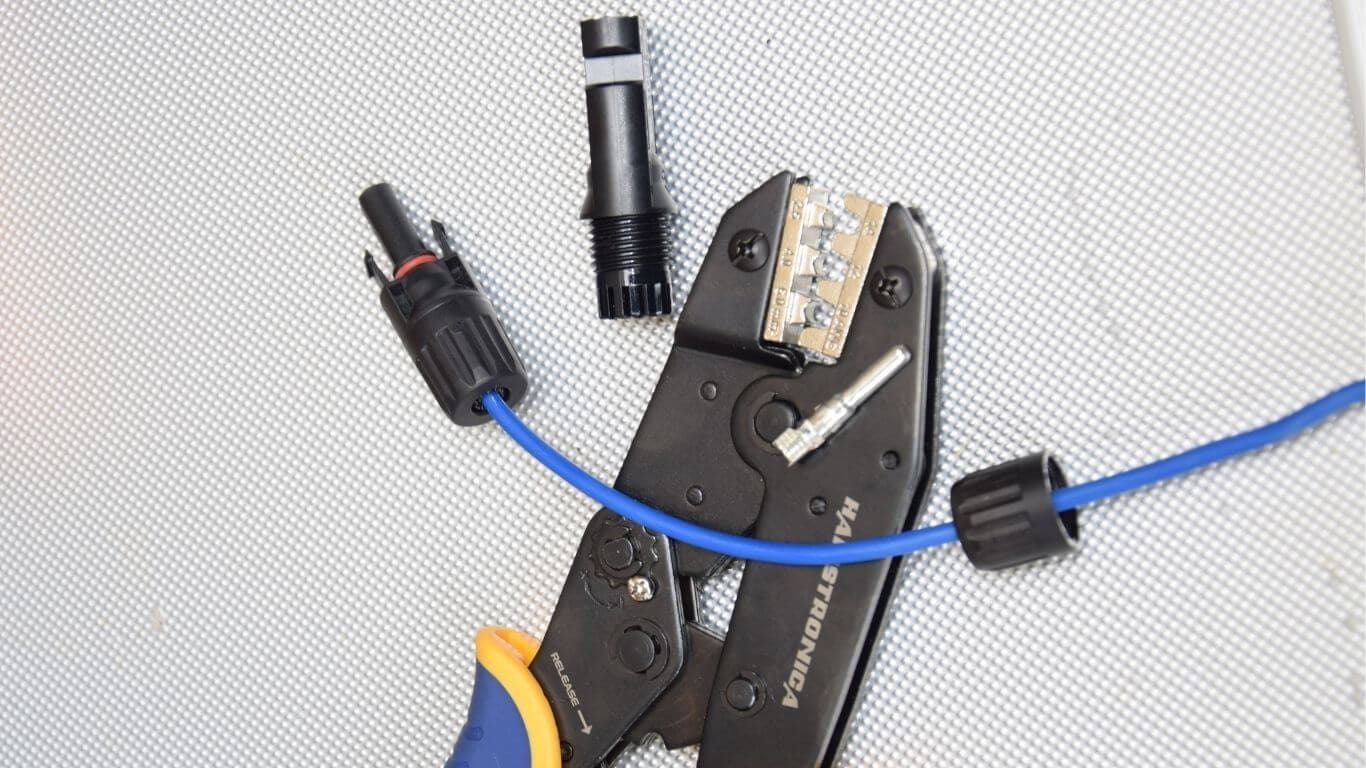
Before beginning the wiring process, ensure you have the correct tools. Using pliers or standard wire cutters to “crimp” the metal pin is a common mistake that leads to loose contacts. You must use a dedicated MC4 crimping tool specifically calibrated for the wire gauge you are using. A proper crimp creates a cold weld between the copper strands and the metal contact, ensuring minimal voltage drop.
In addition to the crimper, you need a wire stripper capable of handling solar cable insulation, which is typically thicker and tougher than standard electrical wire. You also need a pair of MC4 assembly wrenches to tighten the cable glands securely. Without these, you risk under-tightening the seal, which allows water to penetrate the housing and corrode the internal components.
Comparison of MC4 Connector Components
| Component | Function | Material |
|---|---|---|
| Metal Contact | Conducts electricity | Tin-plated copper |
| Insulated Housing | Protects from shock | Polyphenylene oxide (PPO) |
| Sealing Gasket | Prevents moisture | Silicone rubber |
| Cable Gland | Secures the cable | Hardened plastic |
Step-by-Step Wiring Tutorial
Follow these steps carefully to ensure a durable and safe connection for your solar panels.
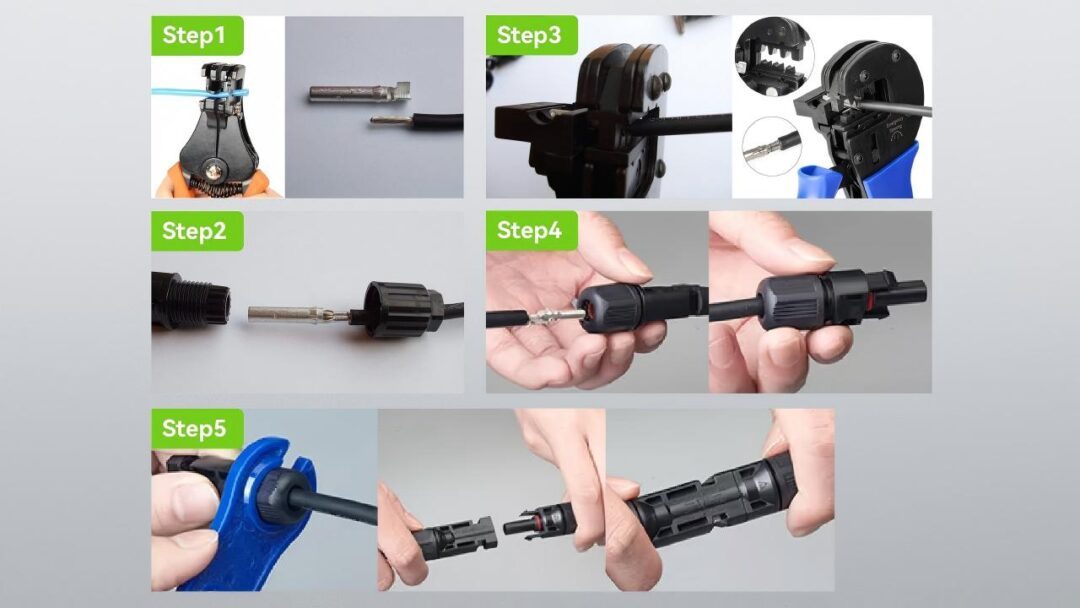
- Strip approximately 10mm to 12mm of insulation from the end of the solar cable using a professional-grade wire stripper, taking care not to nick or cut any copper strands.
- Insert the stripped copper wire into the metal contact pin, ensuring that all strands are fully enclosed and visible through the small inspection hole at the back of the pin.
- Place the pin into the appropriate slot on your MC4 crimping tool and squeeze the handles firmly until the ratchet mechanism releases, indicating a complete crimp cycle.
- Slide the cable gland, the sealing ring, and the main connector housing onto the cable before inserting the crimped pin into the housing.
- Push the crimped pin into the back of the connector housing until you hear a distinct “click” sound, which confirms the locking mechanism has engaged.
- Slide the cable gland forward and screw it onto the back of the housing by hand, then use the MC4 assembly wrenches to tighten it until the internal gasket is fully compressed against the cable jacket.
Common Mistakes to Avoid
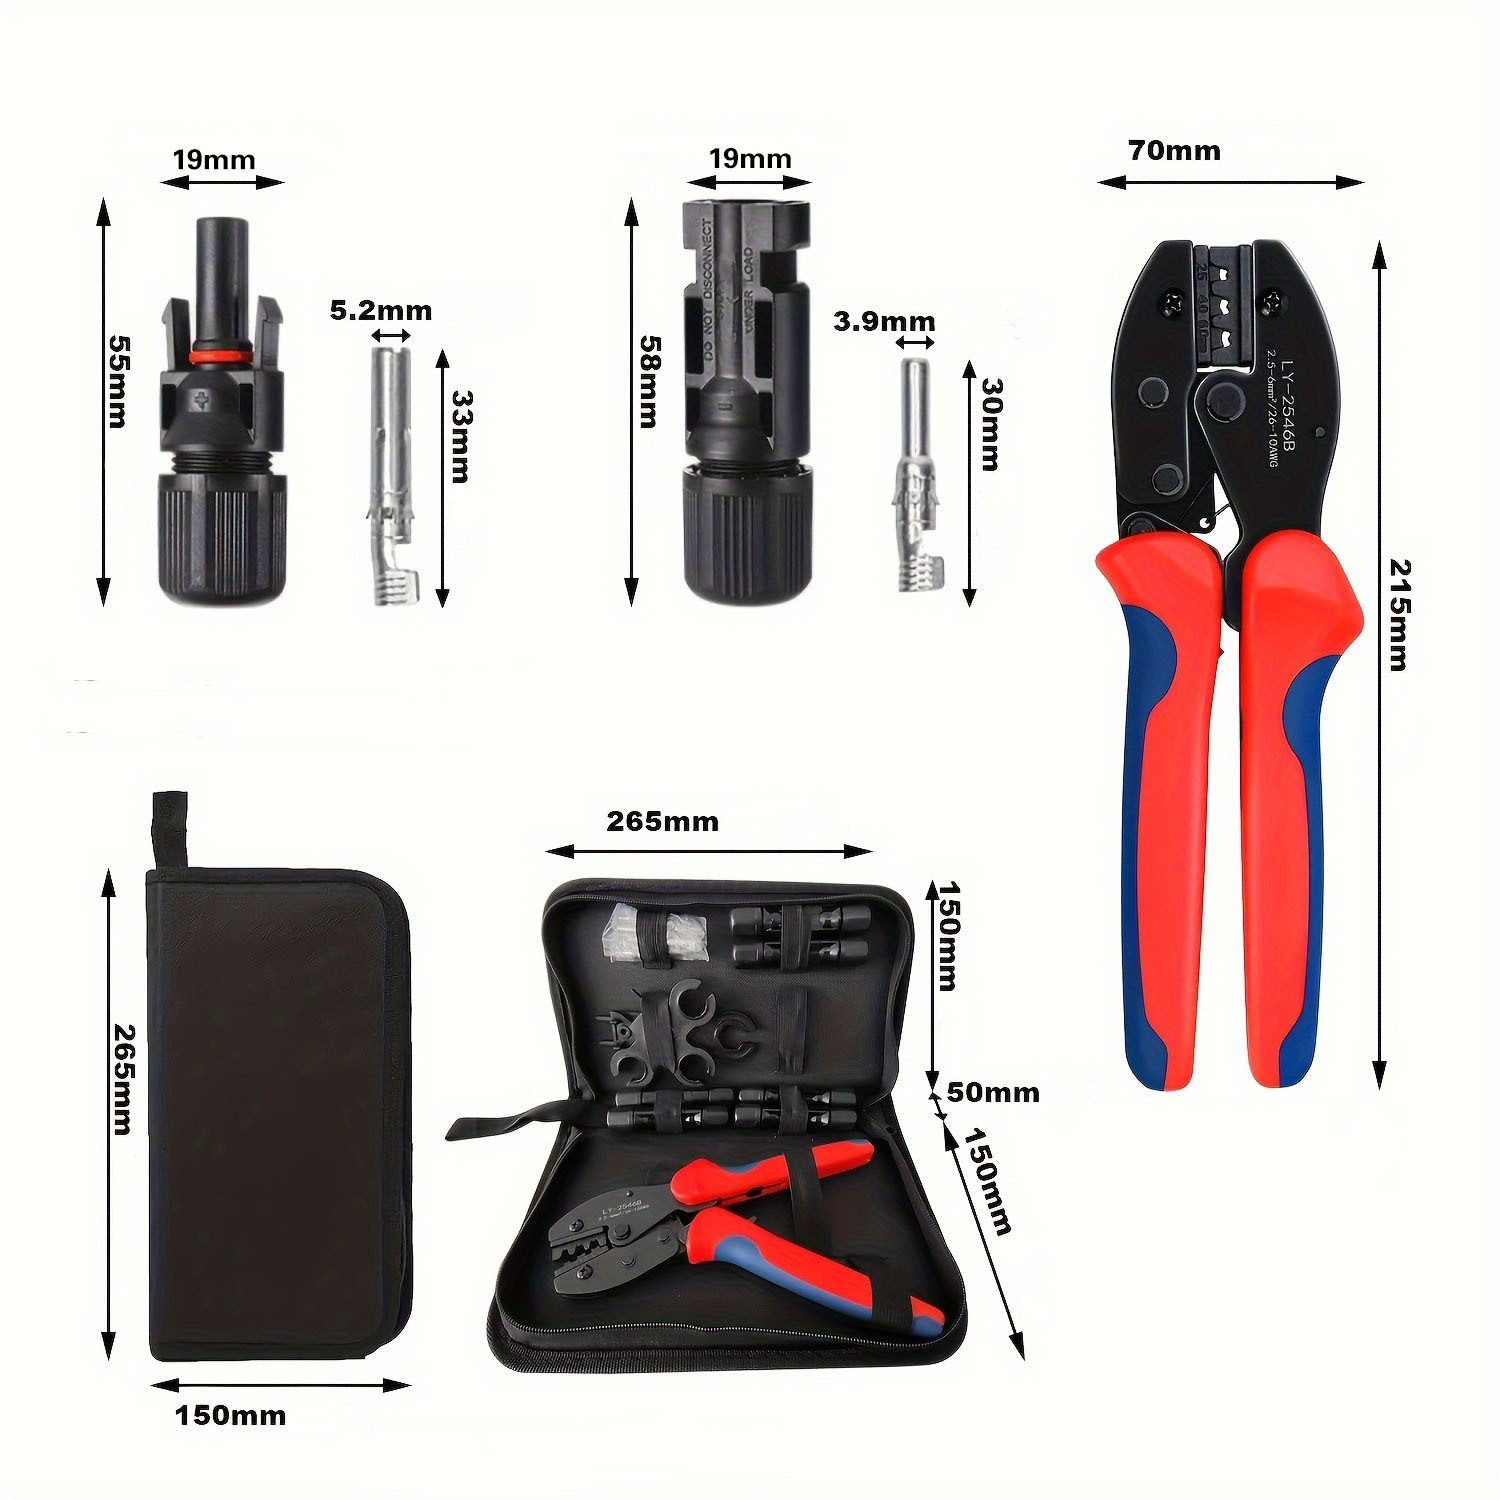
One of the most frequent errors is failing to verify the cable gauge compatibility. MC4 connectors are designed for specific wire ranges, typically 2.5mm squared to 6mm squared. Attempting to force a larger cable into a smaller connector will damage the housing and compromise the seal. Always check the manufacturer’s datasheet for the specific connector model you are using.
Another common oversight is over-tightening the cable gland. While it must be tight enough to prevent moisture entry, excessive force can crack the plastic threads or deform the silicone gasket, actually increasing the risk of water leakage. Use the assembly wrenches only for the final quarter-turn to snug the connection, rather than using extreme force.
Signs of a Faulty Connection
A poorly wired connector often exhibits physical signs of distress over time. If you notice discoloration, melting, or brittle plastic on the connector housing, this is a clear indication of a high-resistance connection caused by a loose crimp. This creates heat, which eventually degrades the plastic housing and the internal gasket.
📷 Photo by 12volt.com.au
If your solar system shows intermittent voltage drops or unexpected ground fault errors, the MC4 connectors are the first place to inspect. Moisture inside the connector creates a conductive path that leads to leakage current. If you find water or corrosion inside an MC4 connector, it cannot be repaired; the entire unit must be cut off and replaced with a new one to maintain the integrity of the string.
📷 Photo by moreday.com
Frequently Asked Questions
Q: Can I reuse MC4 connectors if I make a mistake during assembly?
A: No. MC4 connectors are designed as single-use components. Once the locking tabs are engaged and the housing is tightened, they are meant to remain permanently connected. Attempting to disassemble them often breaks the locking tabs and ruins the sealing gasket.
Q: Is it necessary to apply dielectric grease to the metal contacts?
A: Generally, no. High-quality MC4 connectors are designed to be airtight. Applying grease can attract dust and debris, which may interfere with the electrical contact surface. Focus instead on achieving a perfect crimp and proper tightening of the cable gland.
Q: How do I know if the connector is fully locked?
A: You should feel and hear a mechanical “click” when the pin is inserted into the housing. Additionally, you should perform a “tug test” by gently pulling the cable backward; if the pin stays firmly locked inside the housing, the assembly is secure.
Maintaining high standards during the installation of MC4 connectors is the hallmark of a professional solar technician. By following the correct crimping sequence and ensuring the cable gland is properly sealed, you ensure the longevity and safety of your renewable energy infrastructure for decades to come.
📷 Photo by pliersman.com