
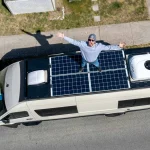


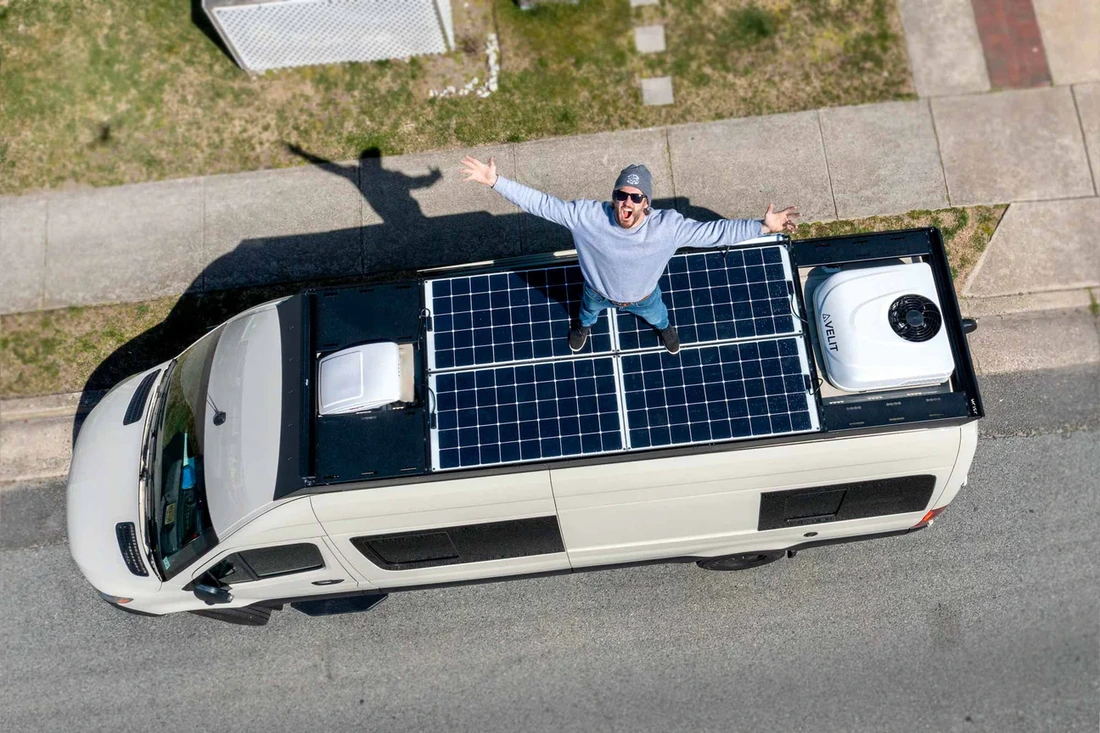
Vanonpower.com – A standard 144-inch wheelbase Sprinter van roof can typically accommodate between two and four solar panels, depending on the specific wattage, panel dimensions, and the presence of roof-mounted equipment like fans or air conditioning units.
Maximizing solar real estate on a 144-inch wheelbase Sprinter is a strategic puzzle that balances energy needs against physical constraints. While the roof length provides roughly 120 inches of usable space, the actual layout is dictated by the placement of roof vents, skylights, and the curvature of the van’s edges.
Understanding the Roof Dimensions
The 144-inch wheelbase Sprinter van features a roof area that is approximately 120 inches long and 60 inches wide. However, you cannot use the entire surface area. The roof curves significantly toward the edges, which makes mounting rigid panels difficult without expensive or bulky mounting brackets. Furthermore, you must account for the “no-go” zones, such as the area required for a rooftop fan, a skylight, or a television antenna.
Most DIY van builders find that they can comfortably fit two 200-watt panels or three 100-watt panels while still leaving room for a vent. If you opt for flexible solar panels, you might be able to squeeze in a few more by following the curvature of the roof, though you must consider the trade-off in heat dissipation and longevity compared to rigid glass panels.
Solar Panel Capacity Comparison
To determine the best fit for your van, consider the following specifications for standard panel types often used in van life conversions:
| Panel Type | Typical Dimensions | Efficiency | Best For |
|---|---|---|---|
| 100W Rigid | 40 x 20 inches | High | Small setups/Limited space |
| 200W Rigid | 58 x 26 inches | High | Standard 144 setups |
| Flexible Panels | Varies | Medium | Weight-sensitive builds |
Factors That Limit Your Solar Array
It is rarely just about the raw length of the roof. Several “hidden” factors often force builders to scale back their initial plans. The most common culprit is the roof vent. A standard 14×14 inch roof vent requires a significant cutout, plus surrounding clearance for the mounting flange and sealant. If you install an air conditioning unit, you lose nearly 30 to 40 inches of precious linear length, which could have otherwise held another panel.
Another factor is the mounting hardware. Z-brackets or aluminum extrusions like 80/20 rails require spacing between panels to allow for thermal expansion and to ensure that the mounting feet sit on the structural ribs of the van roof. Attempting to cram panels edge-to-edge often results in a setup that is impossible to clean or repair.
Step-by-Step Guide to Planning Your Solar Layout
Following a structured approach ensures you do not end up with panels that do not fit or that block essential roof components.
- Measure your total roof length and width, then mark the exact locations of your planned roof vent, skylight, or AC unit.
- Create a template using cardboard cutouts of your chosen solar panels to visualize how they sit around your existing roof obstructions.
- Determine your mounting method, such as 80/20 rails or Z-brackets, and ensure there is at least one inch of clearance between the panels and any roof equipment.
- Verify that the panels do not overhang the curved edges of the roof, as this creates wind noise and potential structural stress.
- Draft a wiring diagram to ensure you have enough room to run cables from the panels to the cable entry gland without creating trip hazards or exposed wire loops.
Common Mistakes to Avoid
One of the most frequent errors is failing to account for the van’s “sway” or roof movement. If you bolt panels too tightly to the sheet metal without a proper mounting rail system, the natural flexing of the van body while driving on uneven terrain can cause the mounting brackets to crack or the roof metal to deform. Always use a mounting system that allows for slight movement or use structural adhesive (like 3M VHB tape) in conjunction with mechanical fasteners.
Another mistake is ignoring the angle of the sun. While flat-mounted panels are convenient, they are less efficient than tilted panels. However, on a 144-inch Sprinter, you rarely have the space to install tilting mechanisms for every panel. If you are struggling with power, consider upgrading the efficiency of the panels (using monocrystalline cells) rather than trying to force more panels onto the roof.
Risks of Overloading the Roof
Every van has a maximum roof weight capacity. While solar panels are relatively light, adding heavy aluminum racking, storage boxes, and a large solar array can shift the center of gravity of your vehicle. Always check the Sprinter’s owner manual for the maximum roof load rating. Overloading can lead to handling issues, especially in high winds, and may put excessive strain on the roof mounts during sudden braking.
Q: Can I walk on my solar panels once they are installed on the Sprinter roof?
A: Generally, no. Unless you specifically purchase “walk-on” rated solar panels, walking on them will cause micro-cracks in the silicon cells, drastically reducing their efficiency and lifespan.
Q: Is it better to use one large panel or multiple small panels on a 144-inch van?
A: Multiple smaller panels are often better for a 144-inch wheelbase because they allow you to “fill in the gaps” around vents and AC units, whereas one large panel is difficult to maneuver around obstacles.
Q: Do I need to tilt my panels for better performance in winter?
A: Tilting helps significantly in winter, but it is physically difficult to implement on a 144-inch Sprinter due to space constraints. Most users compensate by adding one extra flat-mounted panel instead of using a tilting rack.
By carefully mapping your roof and prioritizing your power needs against the physical limitations of your 144-inch Sprinter, you can create a robust, reliable solar system that supports your off-grid lifestyle without compromising the structural integrity of your van.
📷 Photo by custommarineproducts.com